Your First Five Minutes
This page walks through the very first thing you do in Aventurine: getting one real bank export into the app. Everything else in the app is built out of that.
Step 1 — Get a file from your bank
Log in to your bank, credit card, or brokerage in your browser and look for Download, Export, or Statements in the transactions view.
Choose CSV if you are offered a choice. Excel (.xlsx), OFX, QFX, and QIF all work too. A PDF statement will not work — it is a picture of a table, not a table. See Supported File Formats for the full list and for what to do if your bank only offers PDF.
Pick as long a date range as the bank will give you. Aventurine is happier with two years of history than with two weeks: charts, averages, and the forecast all get better with more to look at. There is no size limit worth worrying about.
Step 2 — Start the setup
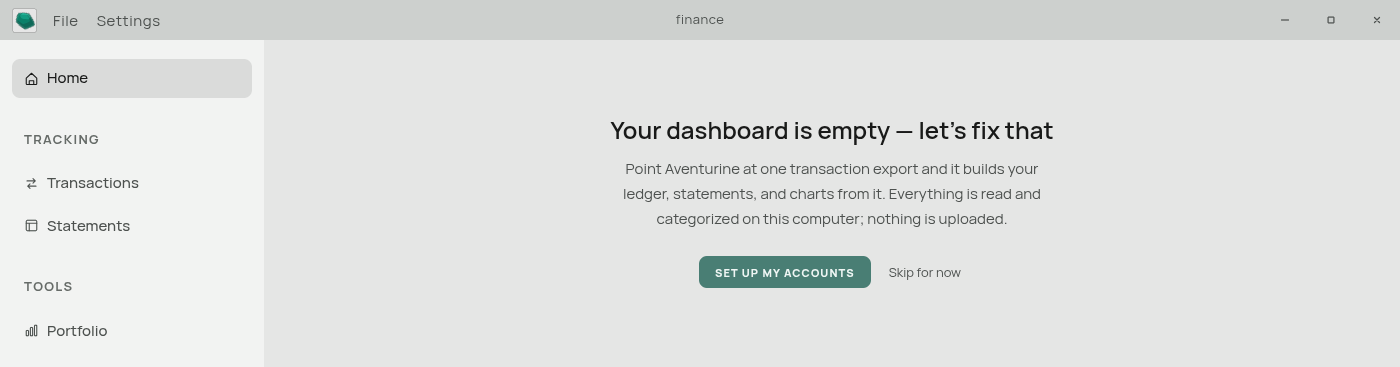
Open Aventurine. On a brand-new database, the dashboard steps aside and shows a single card:
Your dashboard is empty — let’s fix that
Click Set up my accounts.
If you would rather look around first, click Skip for now. The normal dashboard appears with its usual empty states, and you can import at any time from Transactions → Import. Skipping is remembered, so the invitation will not nag you again.
The setup card only appears while the database holds nothing you put there. As soon as you import anything, it is gone for good — it cannot interrupt you later.
Step 3 — Say which account the file is for
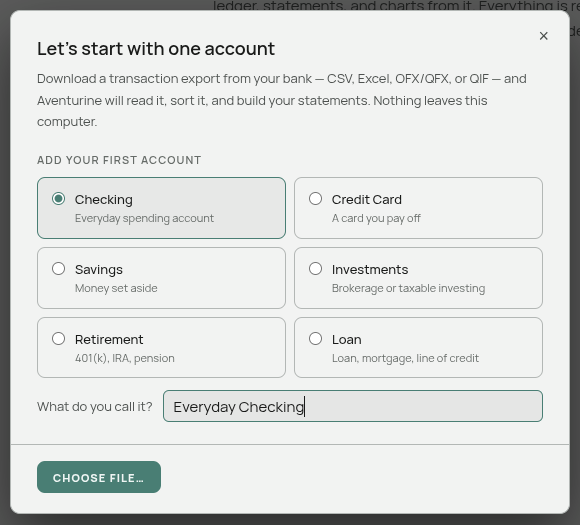
Aventurine asks one question before it asks for the file:
Which account is this coming from?
You see a set of account kinds — Checking, Credit Card, Savings, Investments, Retirement, Loan — and when you pick one, a box appears asking “What do you call it?”
Type the name you use. “Everyday Checking”. “Amex Gold”. “Joint Account”. Not “Checking”.
This matters more than it looks. That name is what you will see on every transaction row, in every account filter, and as a column heading on your Balance Sheet for as long as you use the app. Nothing is pre-selected and nothing is guessed from the file, because a bank’s name tells the app nothing about which of your accounts you meant.
Then click Choose file….
Nothing is created yet. If you close the file dialog and walk away, no account is added and nothing is left behind. The account becomes real only when an import actually lands in it.
Step 4 — Pick the file
Your system’s file picker opens. Choose the file you downloaded in step 1.
Aventurine reads it on the spot. Large files take a second or two and show a progress bar.
Step 5 — Match up the columns
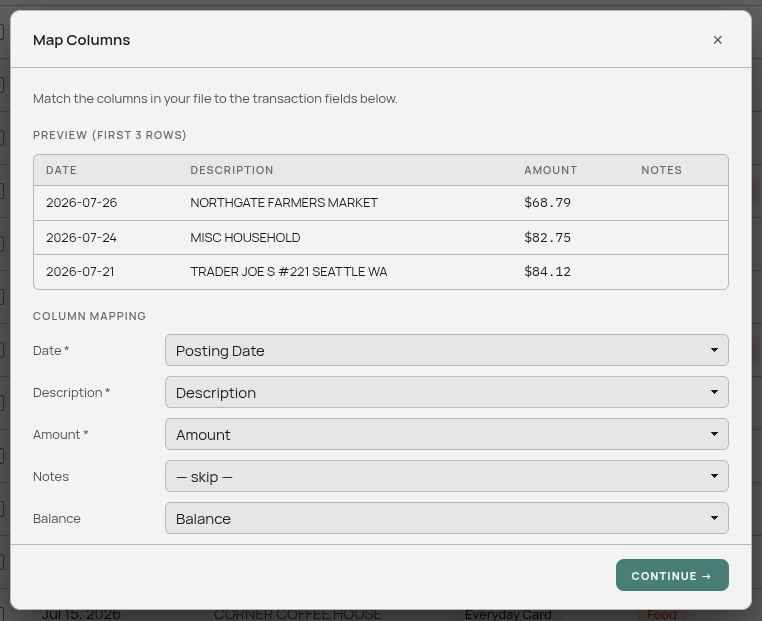
You see Map Columns: a preview of your first three rows on top, and a short list of dropdowns underneath.
Aventurine has already made its guesses. Check the preview — if the dates look like dates and the amounts look like amounts, the guesses are right. Click Continue →.
If something is in the wrong place, change the dropdown for that field and watch the preview update. See Matching Your Columns.
This screen appears for every kind of file. With OFX, QFX, and QIF files it is a formality — those formats state which field is which, so the dropdowns arrive already correct and you just confirm.
Step 6 — Check the import
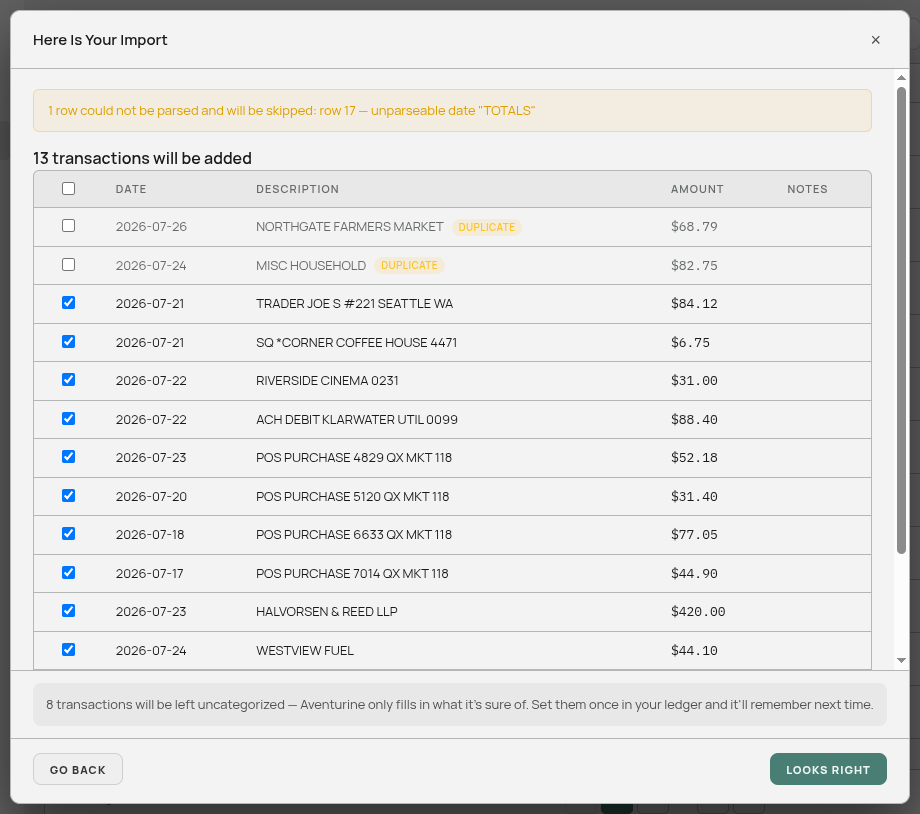
The Here Is Your Import screen shows every row the app read, with a headline telling you how many will be added.
Two things to look at:
- Rows badged “duplicate” are already in your ledger. They come pre-unchecked so they will not be added twice. On a first import there will not be any. See Duplicate Transactions.
- The grey note near the bottom tells you how many transactions will be left uncategorized. This is normal and expected — the app only fills in what it is certain of. See Automatic Categorization.
You can untick any row you do not want. Then click Looks Right.
Go Back returns to the previous screen with nothing saved.
Step 7 — Done
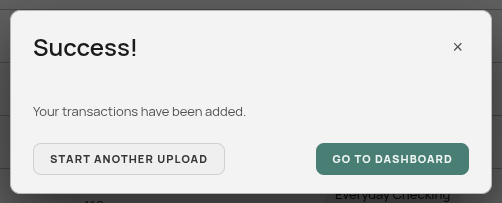
You get a short Success! confirmation with two choices:
- Start Another Upload — go around again for your next account (your credit card, your savings). The account question comes up again, pre-filled with the one you just used.
- Go to Dashboard — finish up and see the result.
What just happened
Behind that one file, quite a lot got built:
- Your transactions are in the ledger, on the Transactions page.
- The account you named now exists and appears on your Balance Sheet.
- The categories the app recognized are filled in; the rest are blank and marked “Uncategorized”.
- Your Cash Flow statement for every year the file touched now computes itself from those transactions — you did not have to create anything.
- Your dashboard has numbers in it.
Step 8 — Clean up the leftovers
Go to Transactions. The sidebar shows a small number badge next to it — that is how many transactions still have no category.
Click the Category filter chip and choose Uncategorized to see just those rows. Then work through them:
- Tick a row and click the pencil icon.
- Set its category.
- Tick “Find similar transactions and apply the same categories” and click Next.
- Aventurine finds every other transaction with a matching description and offers to categorize them all at once.
This is the part that pays off. Every category you set is remembered, so the next import of the same file shape arrives far more complete. See Editing Many Transactions at Once.
Next: The Monthly Routine