Editing Many Transactions at Once
This is the tool that turns an afternoon of categorizing into ten minutes. It is worth learning properly.
Opening it
On the Transactions page, tick the rows you want and click the pencil.
You can tick rows across several pages; the button shows the total count. Note that tightening a filter drops hidden rows from the selection, so a bulk action can never reach a row you cannot see.
Step 1 — Edit
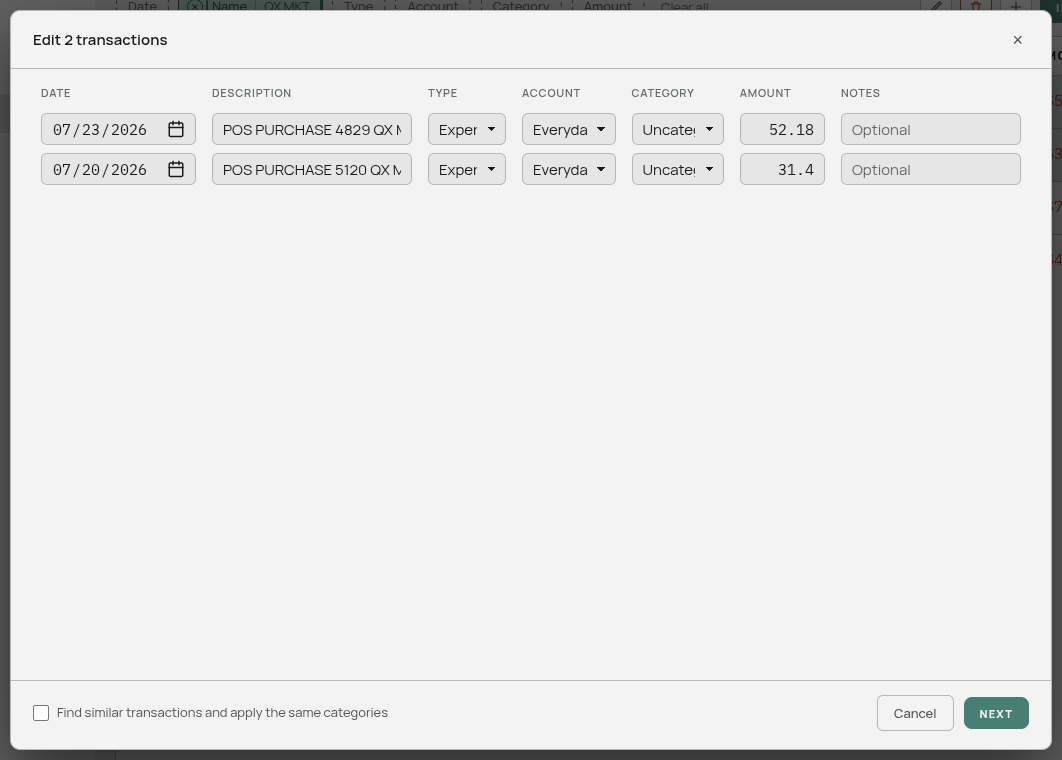
Every selected row is laid out with all its fields editable: Date, Description, Type, Account, Category, Amount, Notes.
Change what you need. Rows you leave alone are not touched — the review step at the end lists exactly what changed and says how many rows were left unchanged.
At the bottom is the checkbox that makes this feature worth using:
Find similar transactions and apply the same categories
Tick it if you want your category choices to spread to matching transactions elsewhere in your ledger. Then click Next.
Step 2 — Find similar
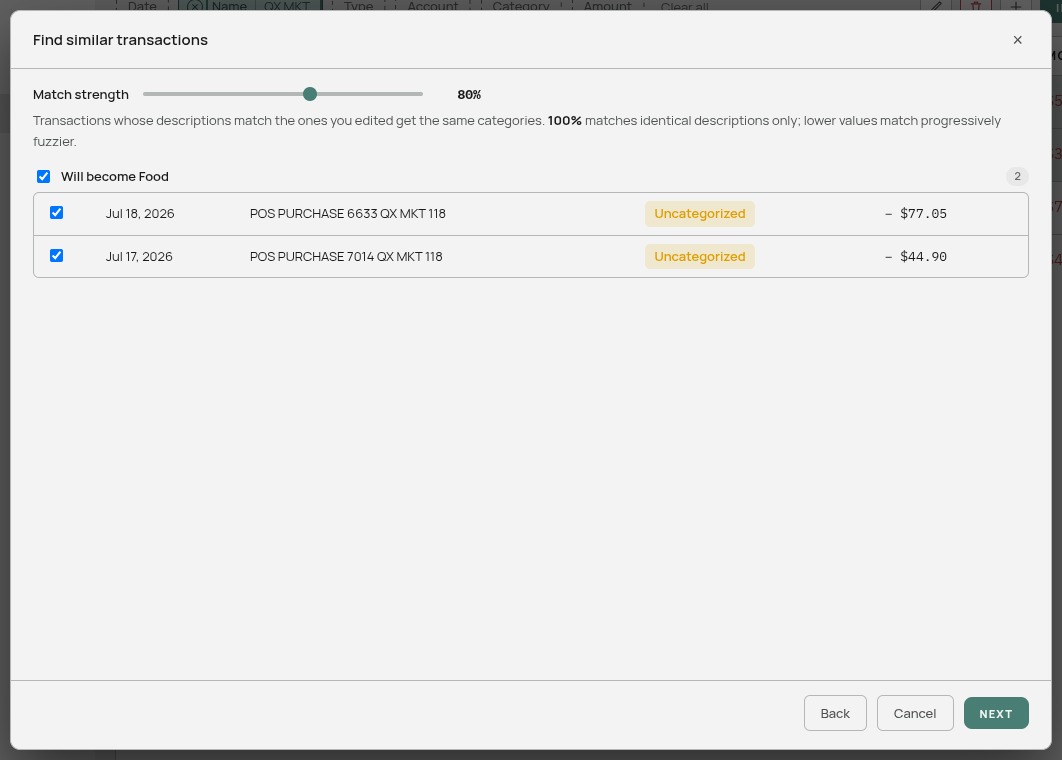
Only appears if you ticked the box.
Aventurine searches your whole ledger for transactions whose descriptions match the ones you just categorized, and lists them grouped by the category each would receive: “Will become Food — 34”.
The match strength slider controls how close a match has to be. It always starts at 80%.
- 100% — identical descriptions only.
- 80% (the default) — close matches. Different store numbers, cities, or reference codes still match.
- Lower — progressively looser. Below about 60% you will start catching unrelated merchants, so read the list.
Moving the slider re-runs the search immediately. The current list stays on screen, slightly dimmed, until the new one arrives, so nothing jumps around while you drag.
Every match is ticked by default. Untick anything that does not belong. Each group header has its own tick-all box.
Read the list before continuing. This step is the one place a single click can change hundreds of rows, and the slider makes it easy to be too generous.
Two behaviours worth knowing:
- Rows already in the target category are left out — there is nothing to do to them.
- A row is only offered once. If two of your edits would both claim the same transaction, the first one gets it, so nothing can be assigned twice.
Click Next.
Step 3 — Review
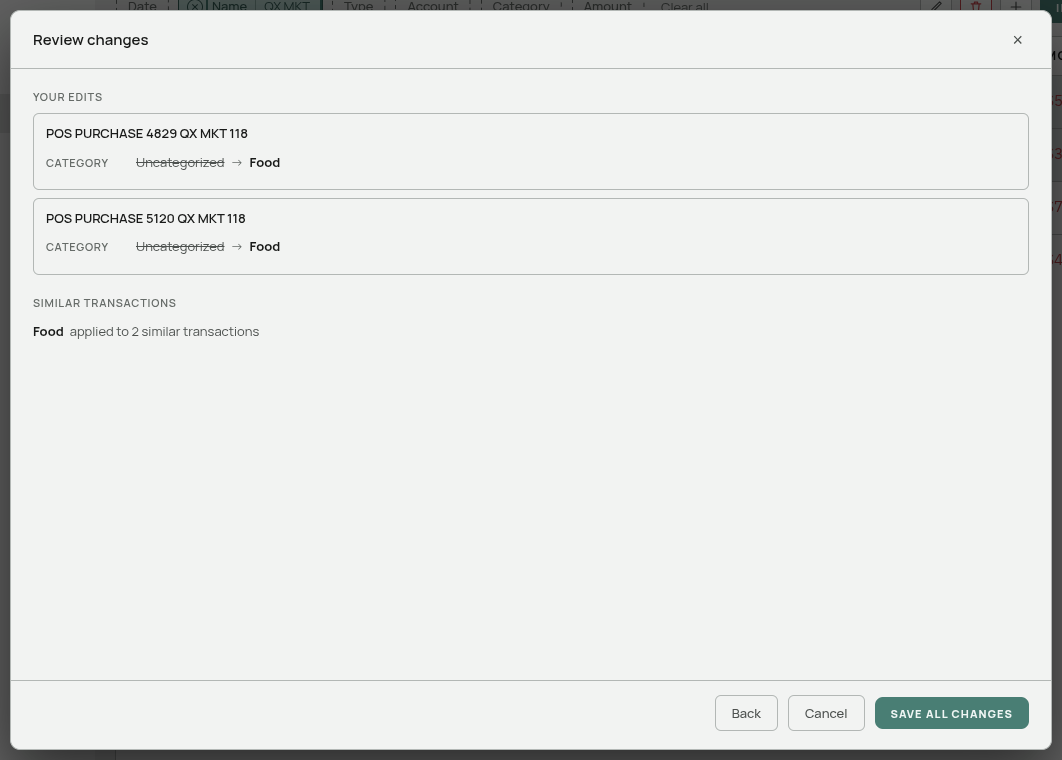
A summary of everything about to happen: each changed row with its old and new values, and a line per category saying how many similar transactions it will be applied to.
Back returns to the previous step. Save all changes commits.
What it changes
Bulk edits overwrite existing categories on the similar transactions you confirmed. This is different from the small “categorize similar” dialog you see after adding a single transaction, which only touches rows that are still uncategorized.
The difference is deliberate: in the wizard you have seen and confirmed each row, so the app does what you asked. In the automatic dialog it has not been reviewed as carefully, so it plays safe.
Everything you confirm also becomes a learned rule, so future imports get the same categories automatically. See Automatic Categorization.
Closing without saving
The × and Cancel discard everything. Clicking the backdrop does not close the dialog — that would throw away a wizard’s worth of edits on a stray click.
If something fails
If some rows cannot be saved, a message says how many and those rows stay selected so you can try again. The ones that succeeded are already saved.
The recommended workflow
For clearing a backlog of uncategorized transactions:
- Category chip → Uncategorized.
- Sort out what you are looking at, largest merchants first.
- Tick one row from a merchant, pencil, set the category, tick “find similar”, Next.
- Check the matches, Next, Save all changes.
- Repeat.
Each pass removes an entire merchant from the pile and teaches the app permanently. Ten passes usually clears most of a year.
Related: Adding and Editing Transactions · Finding Transactions · Automatic Categorization