Importing Transactions
Importing is how data gets into Aventurine. This page walks the whole flow.
Start it from Transactions → Import, or from the “Import transactions” button in any empty state.
Step 1 — Which account is this for?
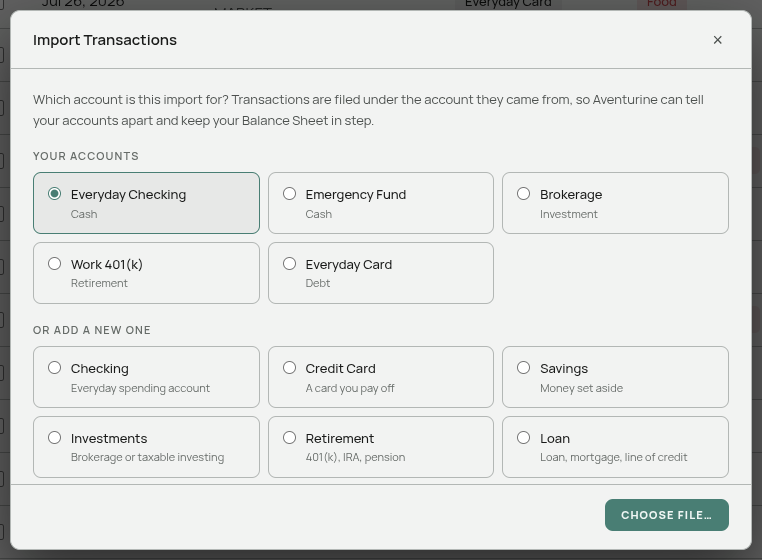
Before the file dialog opens, Aventurine asks which account the transactions belong to.
You see Your accounts (the ones you already have) and Add a new one (the six kinds: Checking, Credit Card, Savings, Investments, Retirement, Loan). Choosing a kind asks you to name it.
The account you used last time is pre-selected, so the routine monthly import is one click. On your first import nothing is selected and the button stays disabled until you choose — the app would rather ask than assume.
Then Choose file….
Why this comes first. Once the account is settled, nothing downstream has to ask again. The preview simply states where the rows are going, and any month-end balances in the file follow the same account without a second question. See Accounts.
Backing out here costs nothing. Closing the dialog leaves no account created and no trace.
Step 2 — Choose the file
Your system’s file picker opens. Pick the file you downloaded from your bank.
Aventurine identifies the format by looking inside the file, not by its extension, so an OFX file saved as .txt still imports correctly. See Supported File Formats.
Large files show a progress bar while they are read.
Step 3 — Match the columns
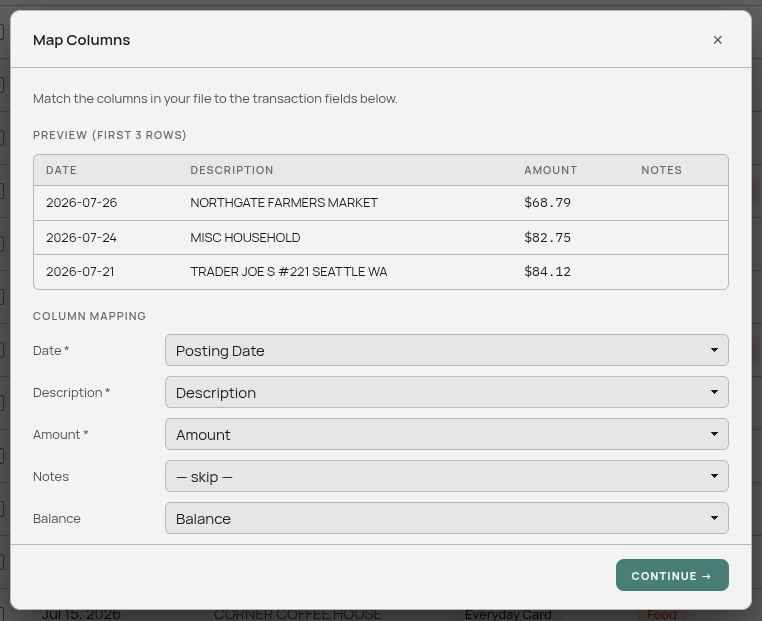
The Map Columns screen: a preview of your first three rows above a short list of dropdowns.
Aventurine has already guessed. If the preview looks right, click Continue →. If not, change a dropdown and the preview updates immediately. Full details in Matching Your Columns.
This screen appears for every format. With OFX, QFX, and QIF files the dropdowns arrive already correct, because those formats state which field is which — the step is a confirmation rather than a puzzle. Nothing is skipped to save you a click, so you always see what the app decided before it acts on it.
Step 4 — Here Is Your Import
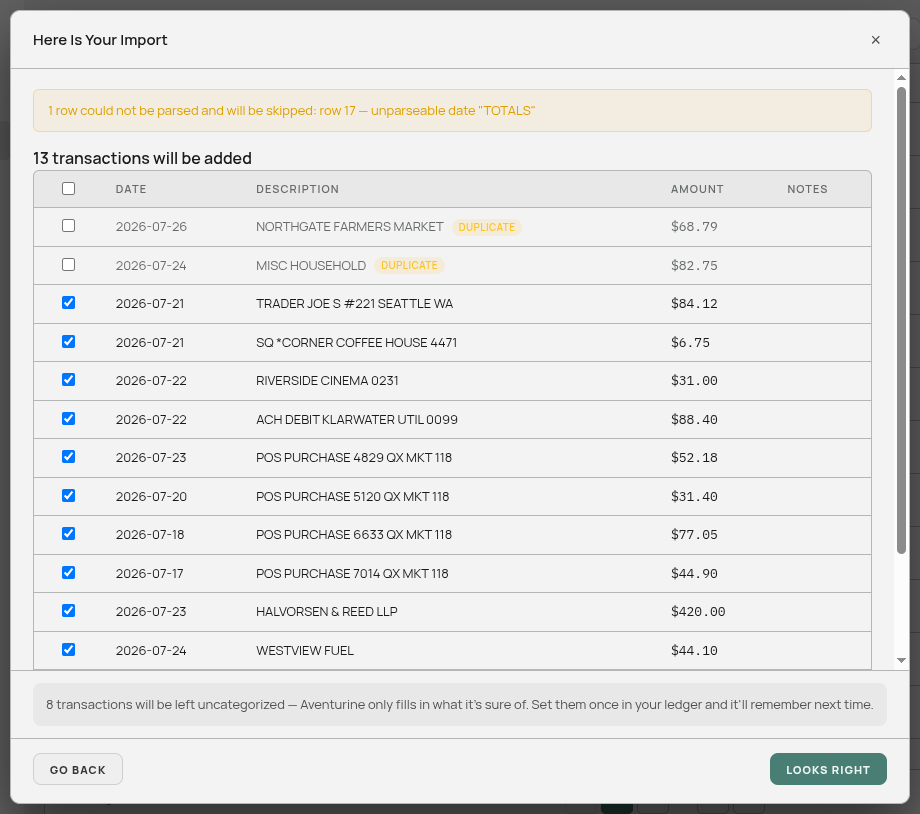
The review screen. Every row Aventurine could read, with a headline: “148 transactions will be added”.
The checkboxes control what gets imported. Untick anything you do not want.
Rows badged “duplicate” already exist in your ledger. They arrive unticked so they will not be added twice — you can tick them if you actually want the duplicate. See Duplicate Transactions.
A banner at the top appears if any rows could not be read, saying how many and why. Those rows are skipped; the rest still import. See Import Problems.
A grey note above the buttons says how many transactions will be left uncategorized:
23 transactions will be left uncategorized — Aventurine only fills in what it’s sure of. Set them once in your ledger and it’ll remember next time.
This count is real. Before you commit to anything, Aventurine has already run the full categorization on these rows without saving them, so the number is what you will actually get. See Automatic Categorization.
Two buttons:
- Go Back — return to the previous screen. Nothing has been saved.
- Looks Right — commit. This is the only button in the whole flow that writes anything.
Step 5 — Success
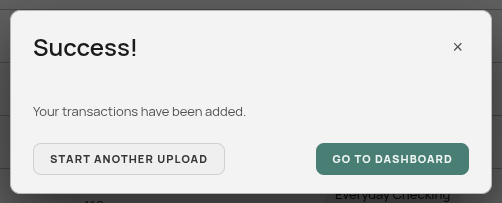
A short confirmation with two choices:
- Start Another Upload — go around again. The account question reappears, pre-filled with the one you just used, since your next file may well be a different account.
- Go to Dashboard — finish and see the result.
What happens when you press “Looks Right”
Several things, in one go:
- The transactions are saved, each filed under the account you chose.
- Categories are applied — first from rules you have taught the app, then from its built-in merchant knowledge. See Automatic Categorization.
- Clean merchant names are attached to rows whose merchant is recognized. See Merchant Names.
- The account becomes real if it was one of the pre-named starter accounts, appearing on your Balance Sheet for the first time. See Accounts.
- Any month-end balances in the file are written into that account’s Balance Sheet cells. See Balances From Your Statement.
- Statement years are created for every year the import touched, in both statements — so imported history immediately feeds your Cash Flow statement and dashboard. See Statement Years.
Importing more than once
Overlapping date ranges are safe. Duplicate detection catches anything already present and unticks it.
Re-importing the same file is safe. Every row is recognized as a duplicate and nothing is added.
Importing several accounts is expected. One file per account, one import each. Use “Start Another Upload” to chain them.
Importing the same account into a different account bucket is a mistake with a manual fix. There is no bulk “move these to another account” — you would filter to that import’s rows, select them, and change the account in the edit dialog. Worth getting right the first time.
What it never does
It never changes an existing transaction. An import only adds rows.
It never deletes anything.
It never guesses the account from the file. Not from the filename, not from an account number inside it.
Related: Supported File Formats · Matching Your Columns · Duplicate Transactions · Import Problems